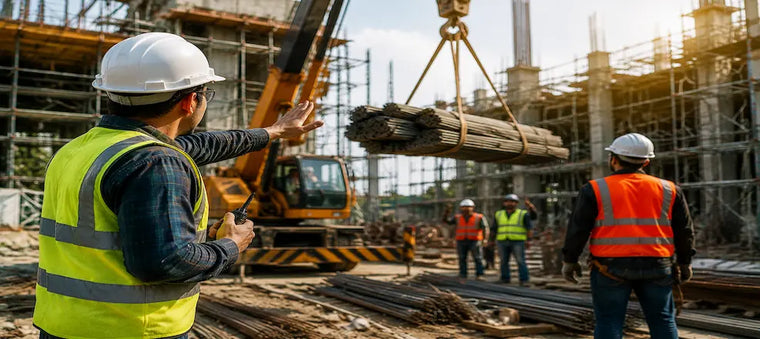
It's early morning, and a site supervisor is walking the yard before roofing, excavation, and lifting work all start within the hour. Several subcontractors are arriving, vehicles are reversing near the site entrance, and materials are still being staged. Conditions like this are exactly why a structured risk assessment matters before work begins.
What Is a Construction Risk Assessment?
A construction risk assessment is the structured process of identifying site hazards, evaluating who may be harmed and how seriously, selecting appropriate controls, assigning responsibility, and reviewing the assessment as site conditions change. A construction site risk assessment works alongside a broader construction safety risk assessment framework to keep everyone on site protected as work progresses.
Why Is Risk Assessment Important in Construction?
Construction sites rarely stay the same for long. Risk changes constantly because of new work phases starting, equipment moving between areas, multiple contractors working side by side, temporary structures going up and coming down, shifting weather conditions, deliveries arriving throughout the day, and access routes changing as work progresses. A risk assessment done once at the start of a project can quickly become outdated if it isn't revisited.
In the US, OSHA's construction industry resources are the primary reference point, and OSHA describes construction as a high-hazard industry involving hazards such as falls, machinery, moving equipment, electrical risks, and harmful substances. Readers outside the US should also consider ILO guidance, ISO 45001, and applicable local regulations, since requirements and enforcement vary by country.
How Do You Conduct a Construction Risk Assessment?
A useful assessment follows the work from planning through control, communication, and review. The steps below walk through that construction risk assessment process from start to finish.
Step 1 — Define the Work, Location and Scope
Start by defining exactly what work is being done. This includes the specific activity, the work location, the current project phase, the equipment involved, which contractors are present, the conditions that mark the start and completion of the task, and how this work interfaces with other activities happening nearby. For example, installing roof panels while lifting operations continue on the ground below creates an interface risk that needs to be captured explicitly. This step forms the foundation of any sound construction project risk assessment and feeds directly into the wider construction safety plan.
Step 2 — Collect Information and Involve Workers
Before hazards can be identified accurately, gather relevant information from existing sources: previous risk assessments, incident and near-miss records, equipment manuals, safety data sheets, site drawings, inspection findings, and direct worker observations. Workers performing the task should be involved directly, since they often recognise practical hazards that paperwork and drawings miss. OSHA's hazard identification and assessment guidance outlines a recommended process that includes collecting existing information, inspecting the workplace, and involving workers in identifying hazards.
Step 3 — Identify Construction Hazards
Rather than building an exhaustive, unmanageable list, group hazards into clear categories:
- Falls and falling objects
- Machinery and vehicles
- Electricity
- Excavations and confined spaces
- Hazardous substances and dust
- Manual handling
- Noise and vibration
- Fire and emergencies
- Fatigue and communication failures
This stage is where construction hazard identification happens most actively, covering the full range of construction hazards and risks present on site. Supporting task-level tools such as a Job Safety Analysis (JSA), Job Hazard Analysis (JHA), Hazard Identification and Risk Assessment (HIRA), or Safe Work Method Statement (SWMS) can help break hazards down further for specific tasks. A JHA construction document, for instance, is useful for capturing step-by-step hazards within a single activity.
Step 4 — Determine Who May Be Harmed and How
Once hazards are identified, consider who could actually be affected and in what way. This includes employees, subcontractors, visitors, delivery drivers, members of the public near the site boundary, new or inexperienced workers, lone workers, and workers with particular accessibility or health needs. It's important to think beyond immediate injury and also consider longer-term occupational-health exposure, such as repeated manual handling strain, prolonged noise exposure, or dust inhalation over time.
Once the hazards and exposed people are understood, the team can evaluate priorities and decide which controls will provide genuine protection.
Step 5 — Evaluate and Prioritise the Risks
Once hazards are identified, each one needs to be evaluated to decide where attention is needed most. This means weighing the likelihood of harm, the potential severity if something goes wrong, the frequency and duration of exposure, the number of people exposed, the strength of existing safeguards, and the possibility of multiple failures happening at once. Many teams use a basic risk matrix (likelihood x severity) to help rank risks, though this isn't universally mandatory and simpler ranking methods work fine on smaller sites. It's worth distinguishing clearly between initial risk — the risk before any controls are applied — and residual risk, which is what remains once controls are in place.
Step 6 — Select Controls Using the Hierarchy of Controls
Controls should be chosen in order of effectiveness, following the hierarchy of controls:
- Eliminate
- Substitute
- Engineering controls
- Administrative controls
- Personal protective equipment
For example, instead of relying only on harnesses, consider eliminating work at height altogether through ground-level assembly, or installing collective fall protection such as guardrails before turning to personal protective equipment as a last line of defence.
Professionals who want to develop practical construction safety management skills can explore the Construction Safety (Site Safety Management) course. Where relevant, this course also includes German regulatory content, which is useful for teams working across EU jurisdictions.
Step 7 — Document, Communicate, Monitor and Review
A completed assessment should record the assigned actions, the responsible person for each one, a completion deadline, any required training, inspection arrangements, the residual risk after controls, how the findings will be communicated to workers, and a review date. Certain triggers should prompt an earlier review regardless of the scheduled date: a new work phase starting, different equipment being introduced, a new contractor joining the site, an incident or near miss, a change in weather, a control that fails in practice, or a change in regulation.
Construction Risk Assessment Example
Task: Installing roof materials Hazard: Falling from an unprotected edge People exposed: Roof workers and workers below Possible consequences: Serious injury or fatality Initial risk: High Controls: Ground-level assembly where possible, edge protection, controlled access, a suitable work platform, inspected fall-arrest equipment, and trained workers Responsible person: Site supervisor Residual risk: Medium or low after verification Review trigger: Change in weather, access system, work method, or workforce
This kind of construction risk assessment example shows how risk assessment for construction workers translates directly into practical construction risk control measures on site.
Construction Risk Assessment Checklist
- Has the work scope been clearly defined?
- Have workers and subcontractors been consulted?
- Have routine and non-routine hazards been identified?
- Have the people exposed to each hazard been recorded?
- Have existing controls been inspected?
- Has the hierarchy of controls been applied?
- Are emergency arrangements adequate?
- Are responsibilities and review triggers documented?
This checklist is a starting point and should be adapted to the specific project and local law.
Common Construction Risk-Assessment Mistakes
- Reusing a generic template without checking it against actual site conditions
- Treating PPE as the first control instead of the last resort
- Excluding workers from the assessment process
- Completing the document but failing to monitor whether controls are actually working
Avoiding these mistakes supports stronger construction safety compliance, more effective construction safety management, and better construction accident prevention across a project.
International Standards and Local Requirements
Regulatory expectations generally follow a layered structure: OSHA applies to covered US workplaces, ILO guidance offers international construction-safety principles, ISO 45001 supports management-system integration, and national or local law sets enforceable regional requirements. The ILO Code of Practice on Safety and Health in Construction promotes preventive safety across the construction-project lifecycle, while ISO 45001 provides a systematic occupational-health-and-safety management framework.
Build Stronger Construction Safety Skills
Effective assessments require more than completing a form. The Construction Safety (Site Safety Management) course helps professionals strengthen their understanding of site hazards, control measures, responsibilities, safety planning, and accident prevention.
A construction risk assessment is a continuing safety process, not a one-time document. When workers participate, hazards are controlled at their source, responsibilities are clear, and assessments are reviewed as conditions change, construction projects become safer and better managed.